> For the complete documentation index, see [llms.txt](https://docs.augelab.com/llms.txt). Markdown versions of documentation pages are available by appending `.md` to page URLs; this page is available as [Markdown](https://docs.augelab.com/key-features/annotate-data-for-object-detection/annotation-window-how-to.md).
# Annotation Window Basics
## Annotate Data for Object Detection
### First Look
{% hint style="info" %}
You will need a computer with a compatible [Nvidia GPU](/introduction/system-requirements.md), AugeLab Studio AI/GPU support enabled, and the required bundle installed through [Module Downloader Window](/augelab-studio-interface/external-features/module-downloader.md#installing-the-ai-bundle).
{% endhint %}
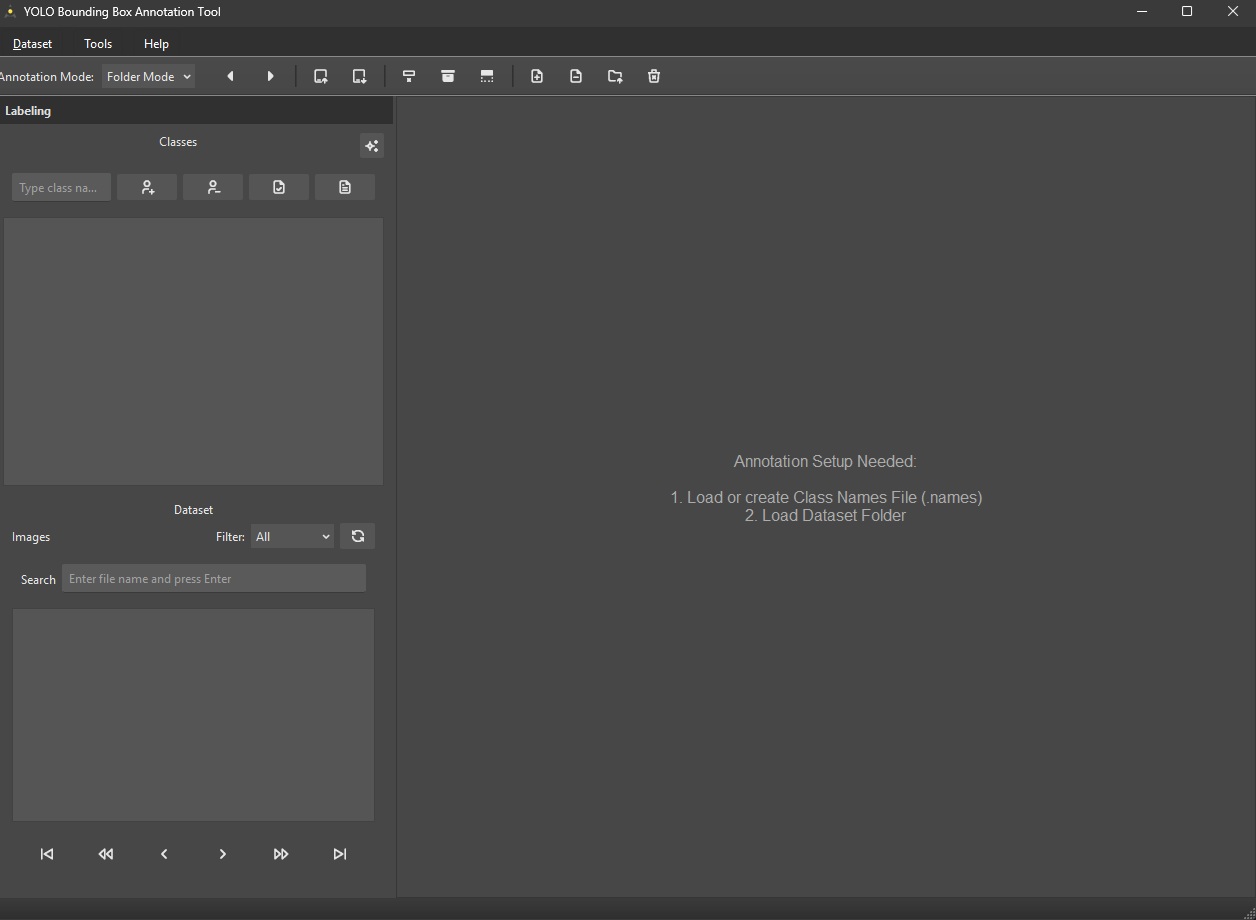
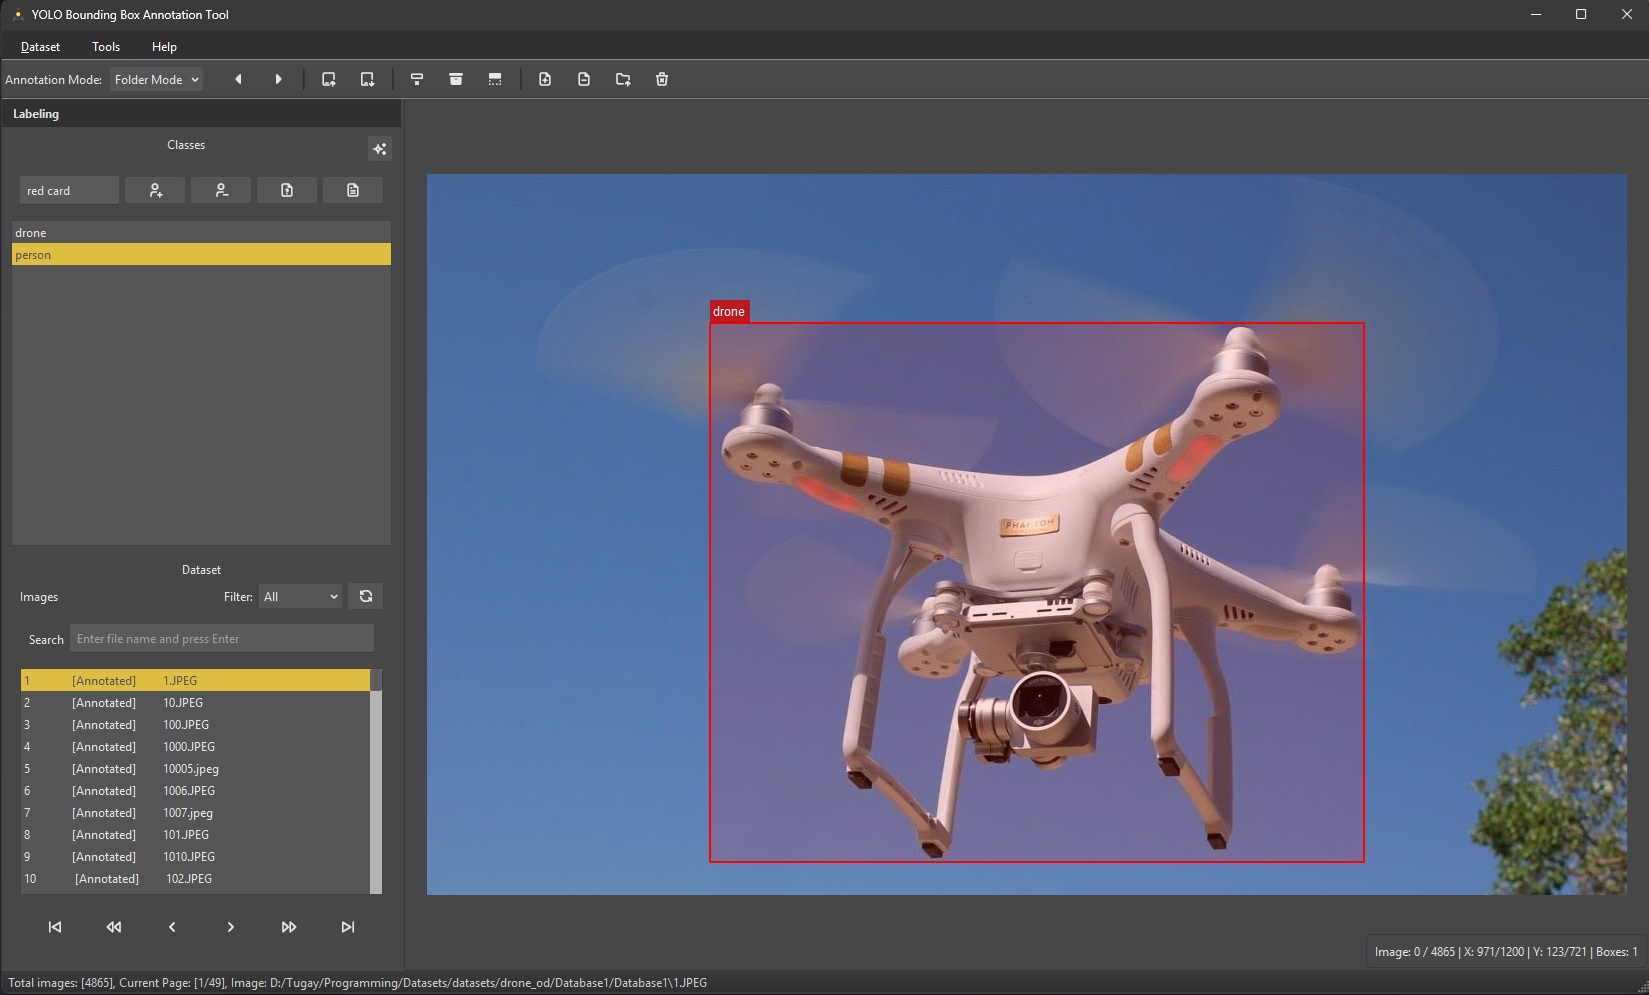
The AugeLab Studio Image Annotation Window allows users to annotate images by drawing bounding boxes around objects of interest and associating them with specific classes.
### Getting Started
To open the Image Annotation Window, navigate to the top menu and click on `AI Tools` ➡️ `Image Annotation`.
For image annotation, you need two things:
1. `.class` file
2. Dataset
### Class File
To label your data, first you need a `classes.names` file, which is a standard text file with *.names* extension. A normal class file looks like below:
```
Human
Dog
Cat
Cup
```
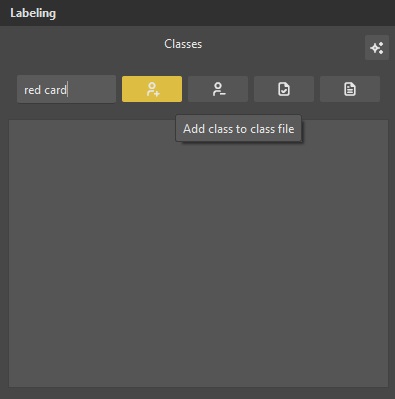
If you do not have such file, you can create your own using the `Classes` section:
To create your own classes file:
1. Type a class name
2. Click on `+` and add your classes.
3. Click on `Save Classes`(third button) and you are ready to pick a folder.
You may also click on `-` to remove any unwanted classes.
### Load Image Folder
{% hint style="warning" %}
Make sure path to your dataset do not contain any non-english characters.
{% endhint %}
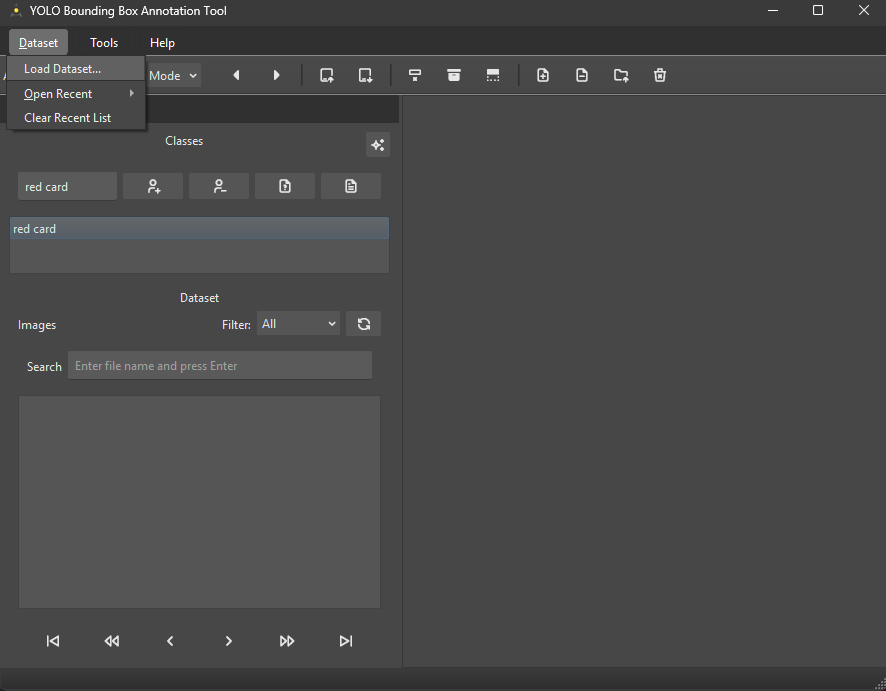
Click on `Open Folder` at the top of the screen and choose the folder that contains all of your images:
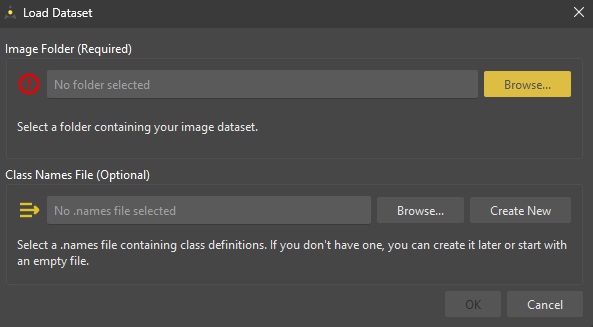
After clicking on `Open Folder`, a dialog will appear asking you to choose a folder and a class file:
Select Image from List: After loading the image folder, a list of available images will be displayed. Click on an image to select it for annotation.
### Annotating Images
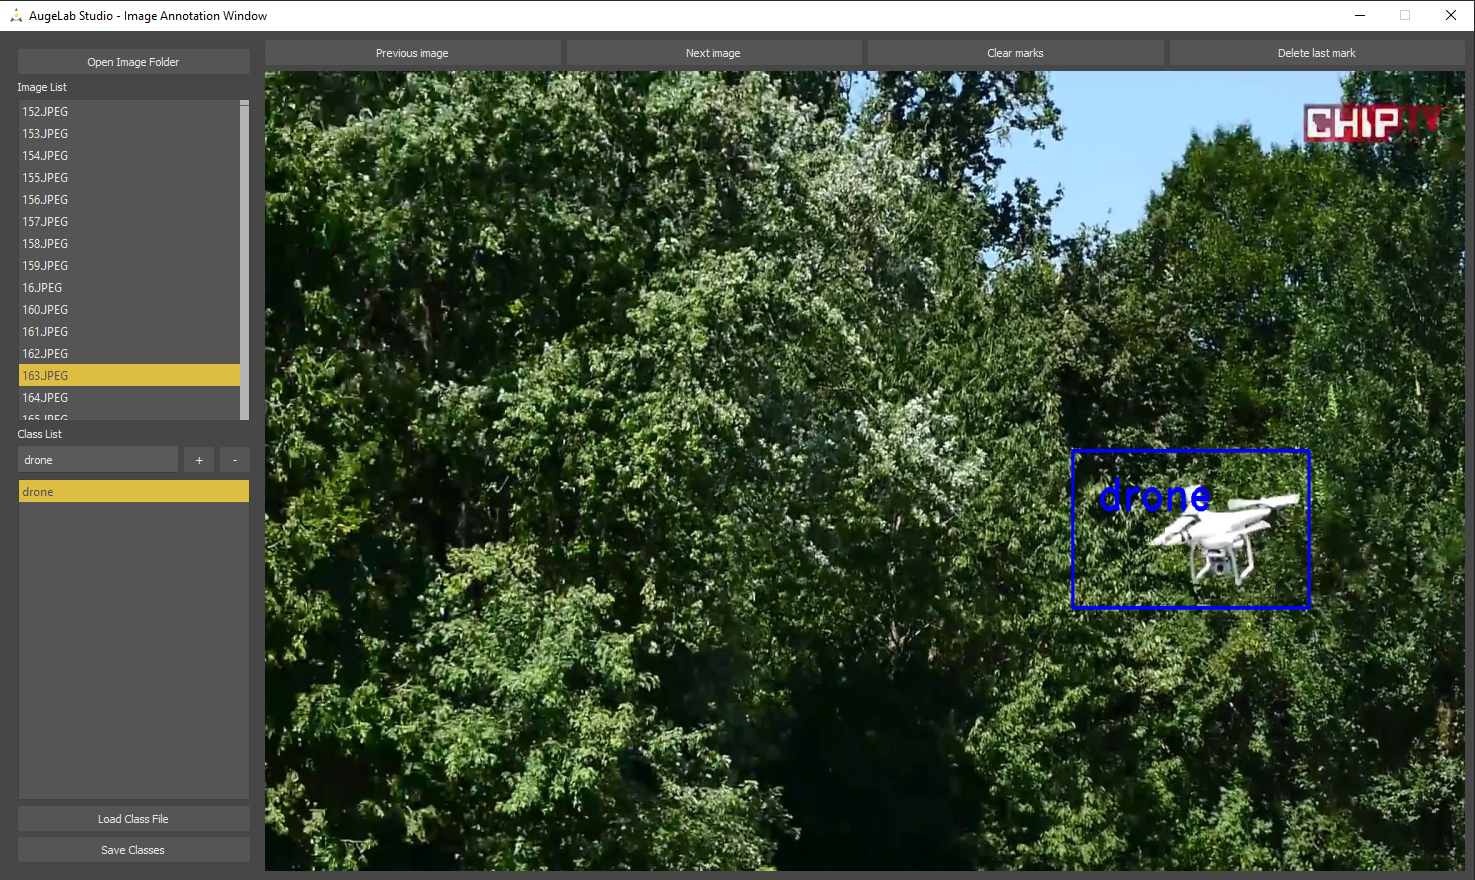
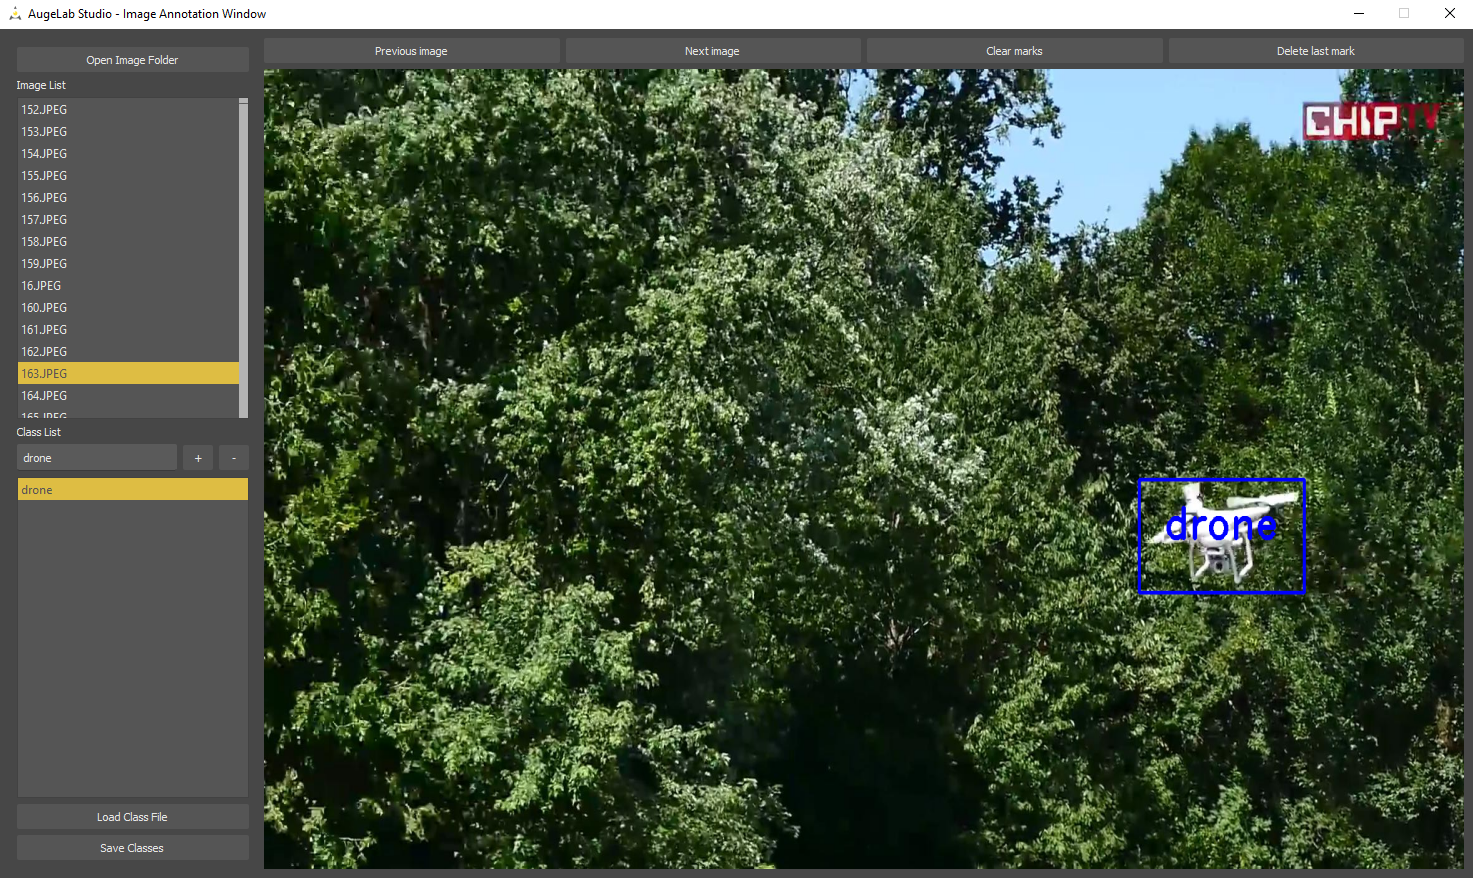
Annotating images are pretty simple. Click on the top left of the object you'd like to detect, drag the mouse and release it when you are done!

Bouding boxes should tightly fit around the object of interest without including too much background. This helps the model learn to focus on the relevant features of the object.
{% tabs %}
{% tab title="Bad Annotation" %}
{% endtab %}
{% tab title="Good Annotation" %}
{% endtab %}
{% endtabs %}
### Using the Dataset Panel
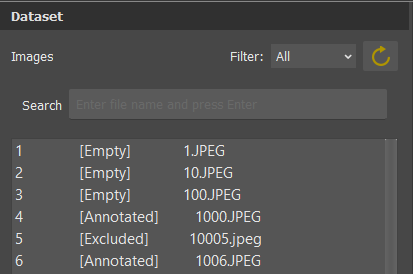
Dataset features several functionalities:
1. `Filter` function that allows you to filter several image classes:
* `All` All images with and without annotation
* `Annotated` images have annotations with them.
* `Empty` images do no contain annotations, but included in the training. This means objects that are not annotated may negatively impact training.
* `Excluded` images do no have an annotation file. This means they do not affect training whatsoever.
2. `Search` functionality will allow you to filter images with their names.
### Annotating Videos
You can also annotate video files using the **Video** mode on the top side of the window:

Changing video mode will ask you for a file path. Choosing the video will allow you to annotate a video just like a folder!
### Tools
There are several tools inside the Annotation Tool to help you during your dataset preparation:
#### Class Frequency Analysis
Clicking on class frequency analysis will analyze and show you how many classes exist in your dataset.
This is useful to check if you have a balanced dataset or not.
#### Augment Dataset
AugeLab Studio automatically applies dataset augmentation. Augmentation is the process of artificially creating similar data.
This subject is detaily covered in [**Augmenting Your Dataset**](/key-features/annotate-data-for-object-detection/augment-dataset.md) page.
## 🛠️ Troubleshooting AI Vision
If your AI models aren't behaving as expected, use these quick-fix toggles to tune your performance.
🚫 "It annotates nothing" (Zero Detections)
When the AI is being too "shy" to label anything, it's usually a threshold or description issue.
* **Lower Confidence:** Drop the **Confidence Threshold** slightly (e.g., ).
* **Text Sensitivity:** For Grounding DINO, lower the **Text Threshold** to be less strict about word matching.
* **Be Specific:** Instead of "part," try "silver metal bolt" or "red plastic cap." Descriptions should be visual.
* **Check Lists:** Verify that your class list is actually loaded in the node settings and isn't empty.
📦 "Too many wrong boxes" (Ghost Detections)
If your screen is cluttered with false positives, you need to tighten the "strictness" of the model.
* **Raise Confidence:** Increase the **Confidence Threshold** to filter out low-certainty guesses.
* **Text Strictness:** Increase the **Text Threshold** to force a closer match between the image and your prompt.
* **Remove Ambiguity:** Avoid broad prompts like "object" or "item." If the AI is labeling shadows as "parts," specifically describe the part's unique colors or textures.
❓ "YOLO model doesn't detect my class"
Standard YOLO models are pre-trained on specific datasets.
* **COCO Standard:** Basic YOLO models only recognize the 80 COCO categories. Your labels must match exactly (e.g., `person`, `cell phone`, `chair`, `bottle`).
* **Custom Needs:** If you need to detect something specific (like a "scratched circuit board"), switch to a **Text-Prompt** model (like Grounding DINO) or train a **Custom YOLO** model.
🐌 "Processing is slow or laggy"
Vision models are computationally expensive.
* **First-Run Delay:** It is normal for the first run to be slow while models download and initialize in memory.
* **Model Size:** Grounding DINO Base and OWLv2 Large are high-accuracy but "heavy." Try a "Tiny" or "Small" variant for faster speeds.
* **Hardware:** Ensure AugeLab is utilizing your **GPU**. Running large AI models on a CPU will result in significant latency.
***
#### 💡 Still stuck?
Try the **AI Assistant** in AugeLab Studio. Describe your specific camera view and what the boxes currently look like; it can often suggest the exact decimal value for your thresholds.
Would you like me to create a **"Threshold Cheat Sheet"** table that explains exactly what Confidence vs. Text thresholds do?]\(./augment-dataset.md).
{% hint style="warning" %}
Augmentation process should be done after finishing annotation
{% endhint %}
{% hint style="warning" %}
Augmentation process may increase the disk size of your dataset up to 10 times.
{% endhint %}
#### Preprocess Image
Preprocess Image tool allows you to change the contrast, brightness and gamma of images that are shown in the window. This feature comes in handy when dealing with very dark or too bright images.

#### Change Class Id
Change Class Id tool will allow you to change the all annotated class instances to a different class.
This tool comes in hand when merging two different datasets.

#### Shortcuts and Help For shorcuts and help, you can click on the `Help` button at the top menu.
* `D`: Show next image or frame.
* `A`: Show previous image or frame.
* `Shift + D`: Move forward by 10 images/frames.
* `Shift + A`: Move backward by 10 images/frames.
* `W`: Decrement class selection.
* `S`: Increment class selection.
* `Shift + W`: Decrement class selection by 3.
* `Shift + S`: Increment class selection by 3.
* `X`: Remove the last bounding box annotation.
* `Shift + C`: Clear all annotations.
* `O`: Add an empty annotation file or clear annotations.
* `P`: Remove annotations and clear the file.
* `M`: Move or exclude image to another folder (Folder Mode only).
* `Shift + Delete`: Remove image and annotation from computer (Folder Mode only).
#### Training With Custom AI Object Detection Model
To train a custom object detection model, please refer to [**Object Detection Train**](/key-features/train-custom-ai-models-with-training-window.md).