Widget to Socket Utility

Widget to Socket turns a node controls into an input socket. Use it when a value that is normally typed, selected, or dragged inside a node must come from another block instead.

Example uses:

  • Drive a threshold from a calculation.

  • Let an HMI or manual input control a node parameter.

  • Feed settings from a PLC, barcode reader, recipe file, or headless script.

  • Test several parameter values without opening the node and editing the widget each time.

This page walks through one small scenario. You will convert a widget into a socket, connect a dynamic value, run the scenario, then convert it back.

What You Will Build

You will create a range value from two number inputs and feed it into a converted widget socket.

Scenario before converting a widget to a socket
Start with a node that still uses its normal on-node widget.
Step 1: Add Example Blocks

Create a new scenario and add these blocks:

  1. Add two Number Input blocks.

  2. Add one Mux block.

  3. Add one Number Range block.

  4. Add one output or debug block so you can inspect the result.

Set the first Number Input to the lower value, for example 10.

Set the second Number Input to the upper value, for example 80.

Connect both number inputs into Mux.

circle-info

This example uses Number Range because the range slider is easy to recognize. The same workflow applies to other node widgets that show the API conversion action.

Step 2: Open the Widget Menu

Right-click the widget you want to control from another block.

On the Number Range block, right-click the Range Slider widget.

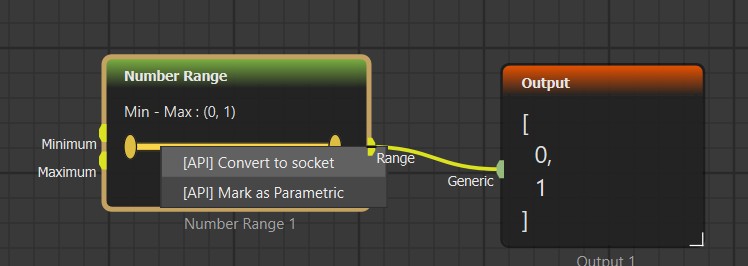
Widget context menu with API conversion action
Right-click the widget and choose the API conversion action.
Choose:

Step 3: Confirm the New Socket

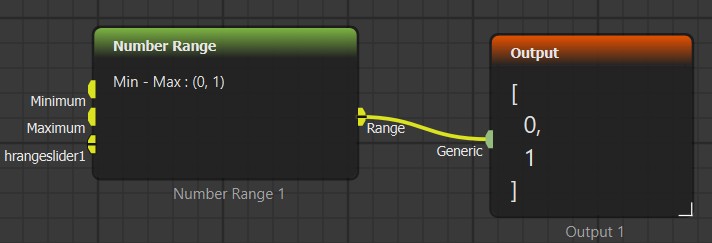
After conversion, the widget is hidden and a new input socket appears on the node.

New input socket created from the converted widget
The widget setting is now available as an input socket.
The socket name matches the converted widget name. This makes it easier to understand which parameter you are controlling.

Step 4: Connect the Dynamic Value

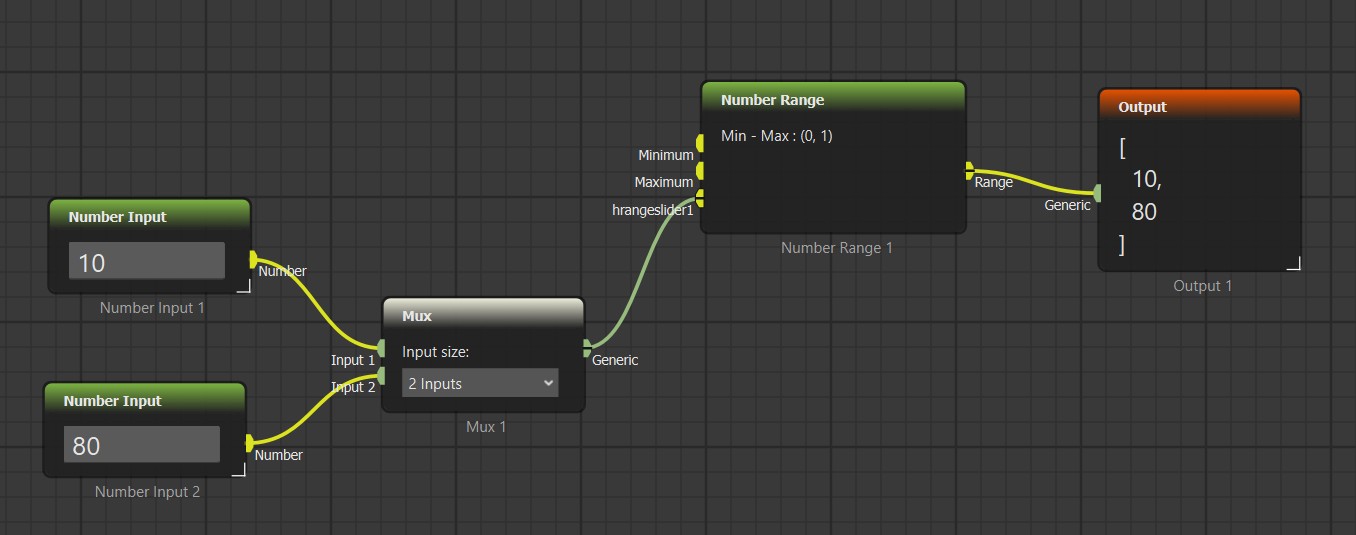
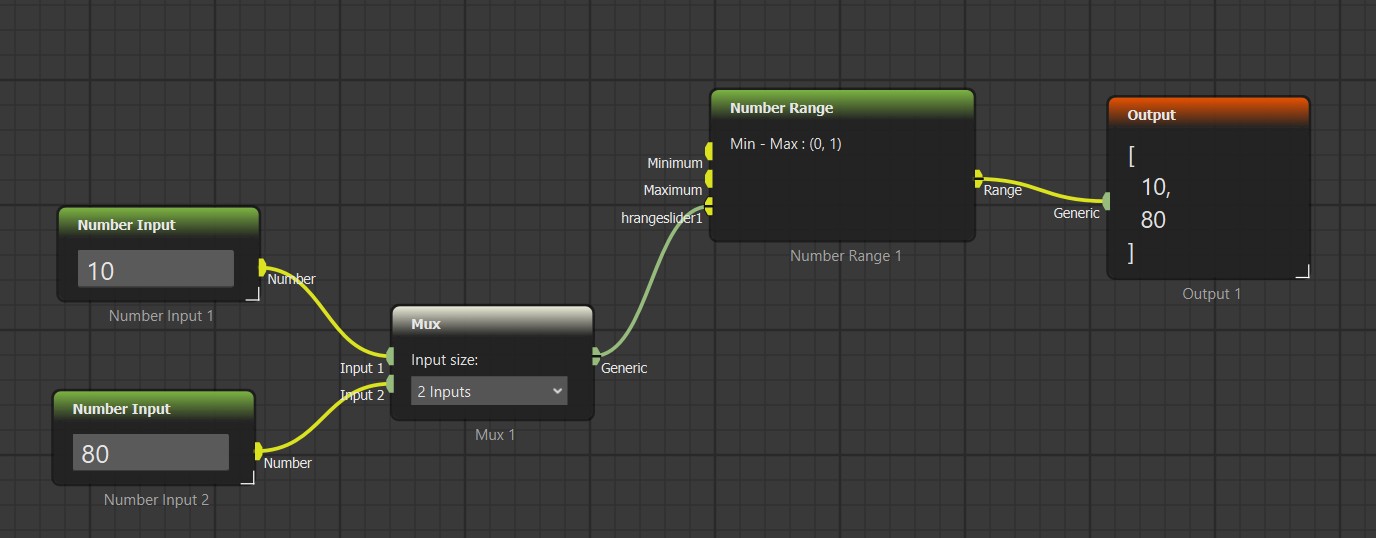
Connect the Mux output to the new converted socket on Number Range.

Mux output connected to the converted widget socket
The node parameter now comes from another part of the scenario.
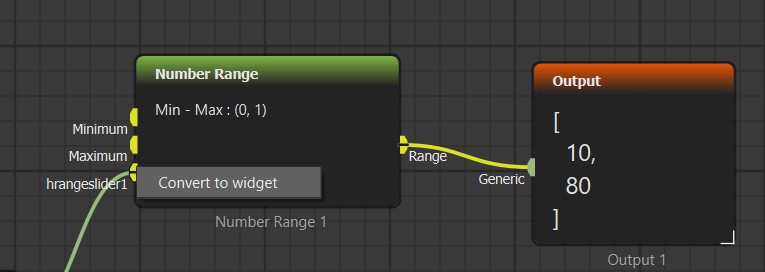
Run the scenario. The Number Range block now reads the incoming value instead of the hidden slider widget.

Change either Number Input value and run again. The range updates through the socket connection.

Step 5: Convert Back If Needed

If you no longer want external control, right-click the converted socket and choose:

Converted socket menu with Convert to widget action
Converted sockets can be restored to their original widget form.

The input socket is removed and the original widget appears again.

When to Use This

Use Widget to Socket when a parameter should be controlled by scenario logic.

Good cases:

  • Recipe-driven thresholds.

  • Operator controls from an HMI.

  • Headless scenarios where values come from a script or file.

  • Automated test scenarios that sweep through many parameter values.

  • Shared parameter values used by several nodes.

Avoid it when the value is always constant. Keeping a normal widget is simpler when no other block needs to control it.

Troubleshooting

If [API] Convert to socket is missing, that widget is not convertible.

If the node result does not change, check that the connected block is producing a value every run.

If the converted socket rejects a connection, the source value type may not match what the widget expects. Use a converter, Mux, Demux, or a matching input block.

If the scenario becomes harder to read, rename nearby blocks so the parameter source is obvious.

Last updated